
02.kubectl
kubectl
kubeadm 是集群的安装配置脚手架,kubectl 是集群管理工具,kubelet 是工作节点上的代理 Daemon 服务, 负责与 Master 节点进行通信。kubectl 是我们日常工作中最常见的 Kubernetes 命令,本部分即对 kubectl 的常用操作进行总结。
补全与插件
自动补全
# Bash
source <(kubectl completion bash) # setup autocomplete in bash into the current shell, bash-completion package should be installed first.
echo "source <(kubectl completion bash)" >> ~/.bashrc # add autocomplete permanently to your bash shell.

alias k=kubectl
complete -F __start_kubectl k

# ZSH
source <(kubectl completion zsh)  # setup autocomplete in zsh into the current shell
echo "if [ $commands[kubectl] ]; then source <(kubectl completion zsh); fi" >> ~/.zshrc # add autocomplete permanently to your zsh shell
插件
K8s 生态圈为我们提供了非常丰富的插件,这里我们可以使用 krew 作为 K8s 的插件安装工具:
(
  set -x; cd "$(mktemp -d)" &&
  curl -fsSLO "https://github.com/kubernetes-sigs/krew/releases/download/v0.3.3/krew.{tar.gz,yaml}" &&
  tar zxvf krew.tar.gz &&
  KREW=./krew-"$(uname | tr '[:upper:]' '[:lower:]')_amd64" &&
  "$KREW" install --manifest=krew.yaml --archive=krew.tar.gz &&
  "$KREW" update
)

export PATH="${KREW_ROOT:-$HOME/.krew}/bin:$PATH"
然后可以通过 krew 来安装插件:
kubectl krew search                 # show all plugins
kubectl krew install view-secret    # install a plugin named "view-secret"
kubectl view-secret                 # use the plugin
kubectl krew upgrade                # upgrade installed plugins
kubectl krew uninstall view-secret  # uninstall a plugin
快速开始
查看基本信息
$ kubectl describe node [nome_do_no]

Name:               elliot-02
Roles:              <none>
Labels:             beta.kubernetes.io/arch=amd64
                    beta.kubernetes.io/os=linux
                    kubernetes.io/arch=amd64
                    kubernetes.io/hostname=elliot-02
                    kubernetes.io/os=linux
Annotations:        kubeadm.alpha.kubernetes.io/cri-socket: /var/run/dockershim.sock
                    node.alpha.kubernetes.io/ttl: 0
                    volumes.kubernetes.io/controller-managed-attach-detach: true

$ kubectl get namespaces

NAME              STATUS   AGE
default           Active   8d
kube-node-lease   Active   8d
kube-public       Active   8d
kube-system       Active   8d

$ kubectl get pod -n kube-system

NAME                                READY   STATUS    RESTARTS   AGE
coredns-66bff467f8-pfm2c            1/1     Running   0          8d
coredns-66bff467f8-s8pk4            1/1     Running   0          8d
etcd-docker-01                      1/1     Running   0          8d
kube-apiserver-docker-01            1/1     Running   0          8d
kube-controller-manager-docker-01   1/1     Running   0          8d
kube-proxy-mdcgf                    1/1     Running   0          8d
kube-proxy-q9cvf                    1/1     Running   0          8d
kube-proxy-vf8mq                    1/1     Running   0          8d
kube-scheduler-docker-01            1/1     Running   0          8d
weave-net-7dhpf                     2/2     Running   0          8d
weave-net-fvttp                     2/2     Running   0          8d
weave-net-xl7km                     2/2     Running   0          8d

$ kubectl get pods --all-namespaces -o wide

NAMESPACE     NAME                                READY   STATUS    RESTARTS   AGE   IP             NODE        NOMINATED NODE   READINESS GATES
default       nginx                               1/1     Running   0          24m   10.44.0.1      docker-02   <none>           <none>
kube-system   coredns-66bff467f8-pfm2c            1/1     Running   0          8d    10.32.0.3      docker-01   <none>           <none>
kube-system   coredns-66bff467f8-s8pk4            1/1     Running   0          8d    10.32.0.2      docker-01   <none>           <none>
kube-system   etcd-docker-01                      1/1     Running   0          8d    172.16.83.14   docker-01   <none>           <none>
kube-system   kube-apiserver-docker-01            1/1     Running   0          8d    172.16.83.14   docker-01   <none>           <none>
kube-system   kube-controller-manager-docker-01   1/1     Running   0          8d    172.16.83.14   docker-01   <none>           <none>
kube-system   kube-proxy-mdcgf                    1/1     Running   0          8d    172.16.83.14   docker-01   <none>           <none>
kube-system   kube-proxy-q9cvf                    1/1     Running   0          8d    172.16.83.12   docker-03   <none>           <none>
kube-system   kube-proxy-vf8mq                    1/1     Running   0          8d    172.16.83.13   docker-02   <none>           <none>
kube-system   kube-scheduler-docker-01            1/1     Running   0          8d    172.16.83.14   docker-01   <none>           <none>
kube-system   weave-net-7dhpf                     2/2     Running   0          8d    172.16.83.12   docker-03   <none>           <none>
kube-system   weave-net-fvttp                     2/2     Running   0          8d    172.16.83.13   docker-02   <none>           <none>
kube-system   weave-net-xl7km                     2/2     Running   0          8d    172.16.83.14   docker-01   <none>           <none>
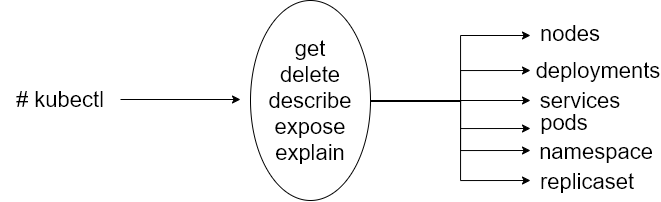
下图为 kubectl 的主要命令结构。
第一个 Pod
$ kubectl run nginx --image nginx

pod/nginx created

$ kubectl get pods

NAME    READY   STATUS    RESTARTS   AGE
nginx   1/1     Running   0          66s

$ kubectl describe pod nginx

Name:         nginx
Namespace:    default
Priority:     0
Node:         docker-02/172.16.83.13
Start Time:   Tue, 12 May 2020 02:29:38 -0300
Labels:       run=nginx
Annotations:  <none>
Status:       Running
IP:           10.44.0.1
IPs:
  IP:  10.44.0.1
Containers:
  nginx:
    Container ID:   docker://2719e2bc023944ee8f34db538094c96b24764a637574c703e232908b46b12a9f
    Image:          nginx
    Image ID:       docker-pullable://nginx@sha256:86ae264c3f4acb99b2dee4d0098c40cb8c46dcf9e1148f05d3a51c4df6758c12
    Port:           <none>
    Host Port:      <none>
    State:          Running
      Started:      Tue, 12 May 2020 02:29:42 -0300
你可以用命令 kubectl get events 检查集群的最新事件。事件如:从 Docker Hub(或其他配置的注册表)下载镜像,创建/删除 pods 等都会被显示出来。
LAST SEEN   TYPE     REASON      OBJECT      MESSAGE
5m34s       Normal   Scheduled   pod/nginx   Successfully assigned default/nginx to docker-02
5m33s       Normal   Pulling     pod/nginx   Pulling image "nginx"
5m31s       Normal   Pulled      pod/nginx   Successfully pulled image "nginx"
5m30s       Normal   Created     pod/nginx   Created container nginx
5m30s       Normal   Started     pod/nginx   Started container nginx
在上一条命令的结果中,可以观察到 nginx 的执行发生在默认的命名空间,而本地仓库中不存在 nginx 镜像,因此,必须下载镜像。
资源的 YAML 描述
就像在 Docker Swarm 中处理 Stack 时一样,k8s 中的资源通常是以 YAML 或 JSON 文件声明,然后通过 kubectl 进行操作。为了省去我们写整个文件的麻烦,可以用 K8S 中现有对象的转储作为模板,如下所示。
$ kubectl get pod nginx -o yaml > meu-primeiro.yaml
通过重定向命令输出 kubectl get pod nginx -o yaml,将创建一个名为 meu-primeiro.yaml 的新文件。
apiVersion : v1
kind : Pod
metadata :
   CREATIONTIMESTAMP : ' 2020-05-12T05: 29: 38Z "
   labels :
     Run : nginx
  managedFields :
  - apiVersion : v1
    fieldsType : FieldsV1
    fieldsV1 :
       f: metadata :
         f: labels :
           . : {}
          f: run : {}
      f: spec :
         f: containers :
           k: {"name": "nginx"}:
             . : {}
            f: image : {}
            f: imagePullPolicy : {}
            f: name : {}
            f: resources : {}
            f: terminationMessagePath : {}
            f: terminationMessagePolicy : {}
        f: dnsPolicy : {}
        f: enableServiceLinks : { }
        f: restartPolicy : {}
        f: schedulerName : {}
        f: securityContext : {}
        f: terminationGracePeriodSeconds : {}
    manager : kubectl
    Operation : Update
    Team : ' 2020-05-12T05: 29: 38Z "
  - apiVersion : v1
    fieldsType : FieldsV1
    fieldsV1 :
       f: Status :
         f: conditions :
           k: {" type ":" ContainersReady "} :
             . : {}
            F: lastProbeTime : {}
            f: lastTransitionTime : {}
            f: Status : {}
            f: type : {}
          k: { "type": "Initialized"} :
             . : {}
            f: lastProbeTime : {}
            f: lastTransitionTime : {}
            f: Status : {}
            f: type : {}
          k: { "type": "Ready"} :
             . : {}
            f: lastProbeTime : {}
            f: lastTransitionTime : {}
            f: status : {}
            f: type : {}
        f: containerStatuses : {}
        f: hostIP : {}
        f: phase : {}
        f: podIP : { }
        f: podIPs :
           . : {}
          k: { "ip", "10.44.0.1"} :
             . : {}
            f: ip : {}
        f: startTime : {}
    manager : kubelet
    operation : Update
    time : " 2020-05-12T05: 29: 43Z "
   name : nginx
  namespace : default
  resourceVersion : " 1673991 "
   selfLink : / api / v1 / namespaces / default / pods / nginx
  uid : 36506f7b-1f3b-4ee8-b063-de3e6d31bea9
spec :
   containers :
  - image : nginx
    imagePullPolicy : Always
    name : nginx
    resources : {}
    terminationMessagePath : / dev / termination-log
    terminationMessagePolicy : File
    volumeMounts :
    - mountPath : /var/run/secrets/kubernetes.io/serviceaccount
      name : default-token-nkz89
      readOnly : true
  dnsPolicy : ClusterFirst
  enableServiceLinks : true
  nodeName : docker-02
  priority: 0
  restartPolicy : Always
  schedulerName : default-scheduler
  securityContext : {}
  serviceAccount : default
  serviceAccountName : default
  terminationGracePeriodSeconds : 30
  tolerations :
  - effect : NoExecute
    key : node.kubernetes.io/not-ready
    operator : Exists
    tolerationSeconds : 300
  - effect : NoExecute
    key :node.kubernetes.io/unreachable
    operator : Exists
    tolerationSeconds : 300
  volumes :
  - name : default-token-nkz89
    secret :
       defaultMode : 420
      secretName : default-token-nkz89
status :
   conditions :
  - lastProbeTime : null
    lastTransitionTime : " 2020-05- 12T05: 29: 38Z "
     status : " True "
     type : Initialized
  -lastProbeTime : null
    lastTransitionTime : " 2020-05-12T05: 29: 43Z "
     status : " True "
     type : Ready
  - lastProbeTime : null
    lastTransitionTime : " 2020-05-12T05: 29: 43Z "
     status : " True "
     type : ContainersReady
  - lastProbeTime : null
    lastTransitionTime : " 2020-05-12T05: 29: 38Z "
     status : "True "
     type : PodScheduled
  containerStatuses :
  - containerId : docker: // 2719e2bc023944ee8f34db538094c96b24764a637574c703e232908b46b12a9f
    image : nginx: latest
    imageid : docker-pullable: // @ nginx sha256: 86ae264c3f4acb99b2dee4d0098c40cb8c46dcf9e1148f05d3a51c4df6758c12
    lastState : {}
    name : nginx
    ready : true
    restartCount : 0
    started : true
    state :
       running :
         startedAt :" 2020-05-12T05: 29: 42Z "
   hostIP : 172.16.83.13
  phase : Running
  podIP : 10.44.0.1
  podIPs :
  - ip : 10.44.0.1
  qosClass : BestEffort
  startTime : " 2020-05-12T05: 29: 38Z "
观察之前的文件,我们注意到它反映了 pod 的状态。我们想把这样的文件只作为一个模板,因此,我们可以从该 pod 中删除存储状态数据的条目,如状态和所有其他特定于它的设置。最终的文件将有类似于这样的内容。
apiVersion : v1
  kind : Pod
  metadata :
     creationTimestamp : null
    labels :
       run : nginx
    name : nginx
  spec :
     containers :
    - image : nginx
      name : nginx
      resources : {}
    dnsPolicy : ClusterFirst
    restartPolicy : Always
  status : {}
现在,我们将用以下命令移除我们的 Pod。
$ kubectl delete pod nginx

$ kubectl create -f meu-primeiro.yaml

$ kubectl get pods

NAME    READY   STATUS    RESTARTS   AGE
nginx   1/1     Running   0          109s
另一种创建文件模板的方式是通过选择 –dry-runof kubectl,根据要创建的资源类型,操作略有不同。举例说明:–dry-runof kubectl
$ kubectl run meu-nginx --image nginx --dry-run=client -o yaml > pod-template.yaml

$ kubectl create deployment meu-nginx --image=nginx --dry-run=client -o yaml > deployment-template.yaml
暴露 Pod
集群之外的设备,默认情况下,无法访问创建的 pod,这与其他容器系统一样。要暴露一个 pod ,运行以下命令。
$ kubectl expose pod nginx
error: couldn't find port via --port flag or introspection
See 'kubectl expose -h' for help and examples
发生错误的原因是 K8s 不知道哪个是应该暴露的容器的目的端口(在这种情况下,80 / TCP)。要配置它,让我们首先删除我们的旧 pod 。
$ kubectl delete -f meu-primeiro.yaml
然后重设如下配置:
...
 spec :
        containers :
       - image : nginx
         imagePullPolicy : Always
         ports :
         - containerPort : 80
         name : nginx
         resources : {}
...
修改文件后,保存文件并使用以下命令再次创建 pod。
$ kubectl create -f meu-primeiro.yaml

pod/nginx created

$ kubectl get pod nginx

NAME    READY   STATUS    RESTARTS   AGE
nginx   1/1     Running   0          32s

$ kubectl expose pod nginx
$ kubectl get services

NAME         TYPE        CLUSTER-IP      EXTERNAL-IP   PORT(S)   AGE
kubernetes   ClusterIP   10.96.0.1       <none>        443/TCP   8d
nginx        ClusterIP   10.105.41.192   <none>        80/TCP    2m30s
正如你所看到的,在我们的集群中,有两个服务:第一个是给 K8s 本身使用的,而第二个是我们刚刚创建的。通过在 CLUSTER-IP 栏中显示的 IP 地址,Nginx 的主界面应该呈现在我们面前。
curl 10.105.41.192

<!DOCTYPE html>
<html>
<head>
<title>Welcome to nginx!</title>
<style>
    body {
        width: 35em;
        margin: 0 auto;
        font-family: Tahoma, Verdana, Arial, sans-serif;
    }
</style>
</head>
<body>
<h1>Welcome to nginx!</h1>
<p>If you see this page, the nginx web server is successfully installed and
working. Further configuration is required.</p>

<p>For online documentation and support please refer to
<a href="http://nginx.org/">nginx.org</a>.<br/>
Commercial support is available at
<a href="http://nginx.com/">nginx.com</a>.</p>

<p><em>Thank you for using nginx.</em></p>
</body>
</html>