Vec
Vector
与我们拥有 &str 和 String 一样,我们拥有数组和向量。数组越快,功能越少,向量越慢,功能越多。类型写为 Vec。

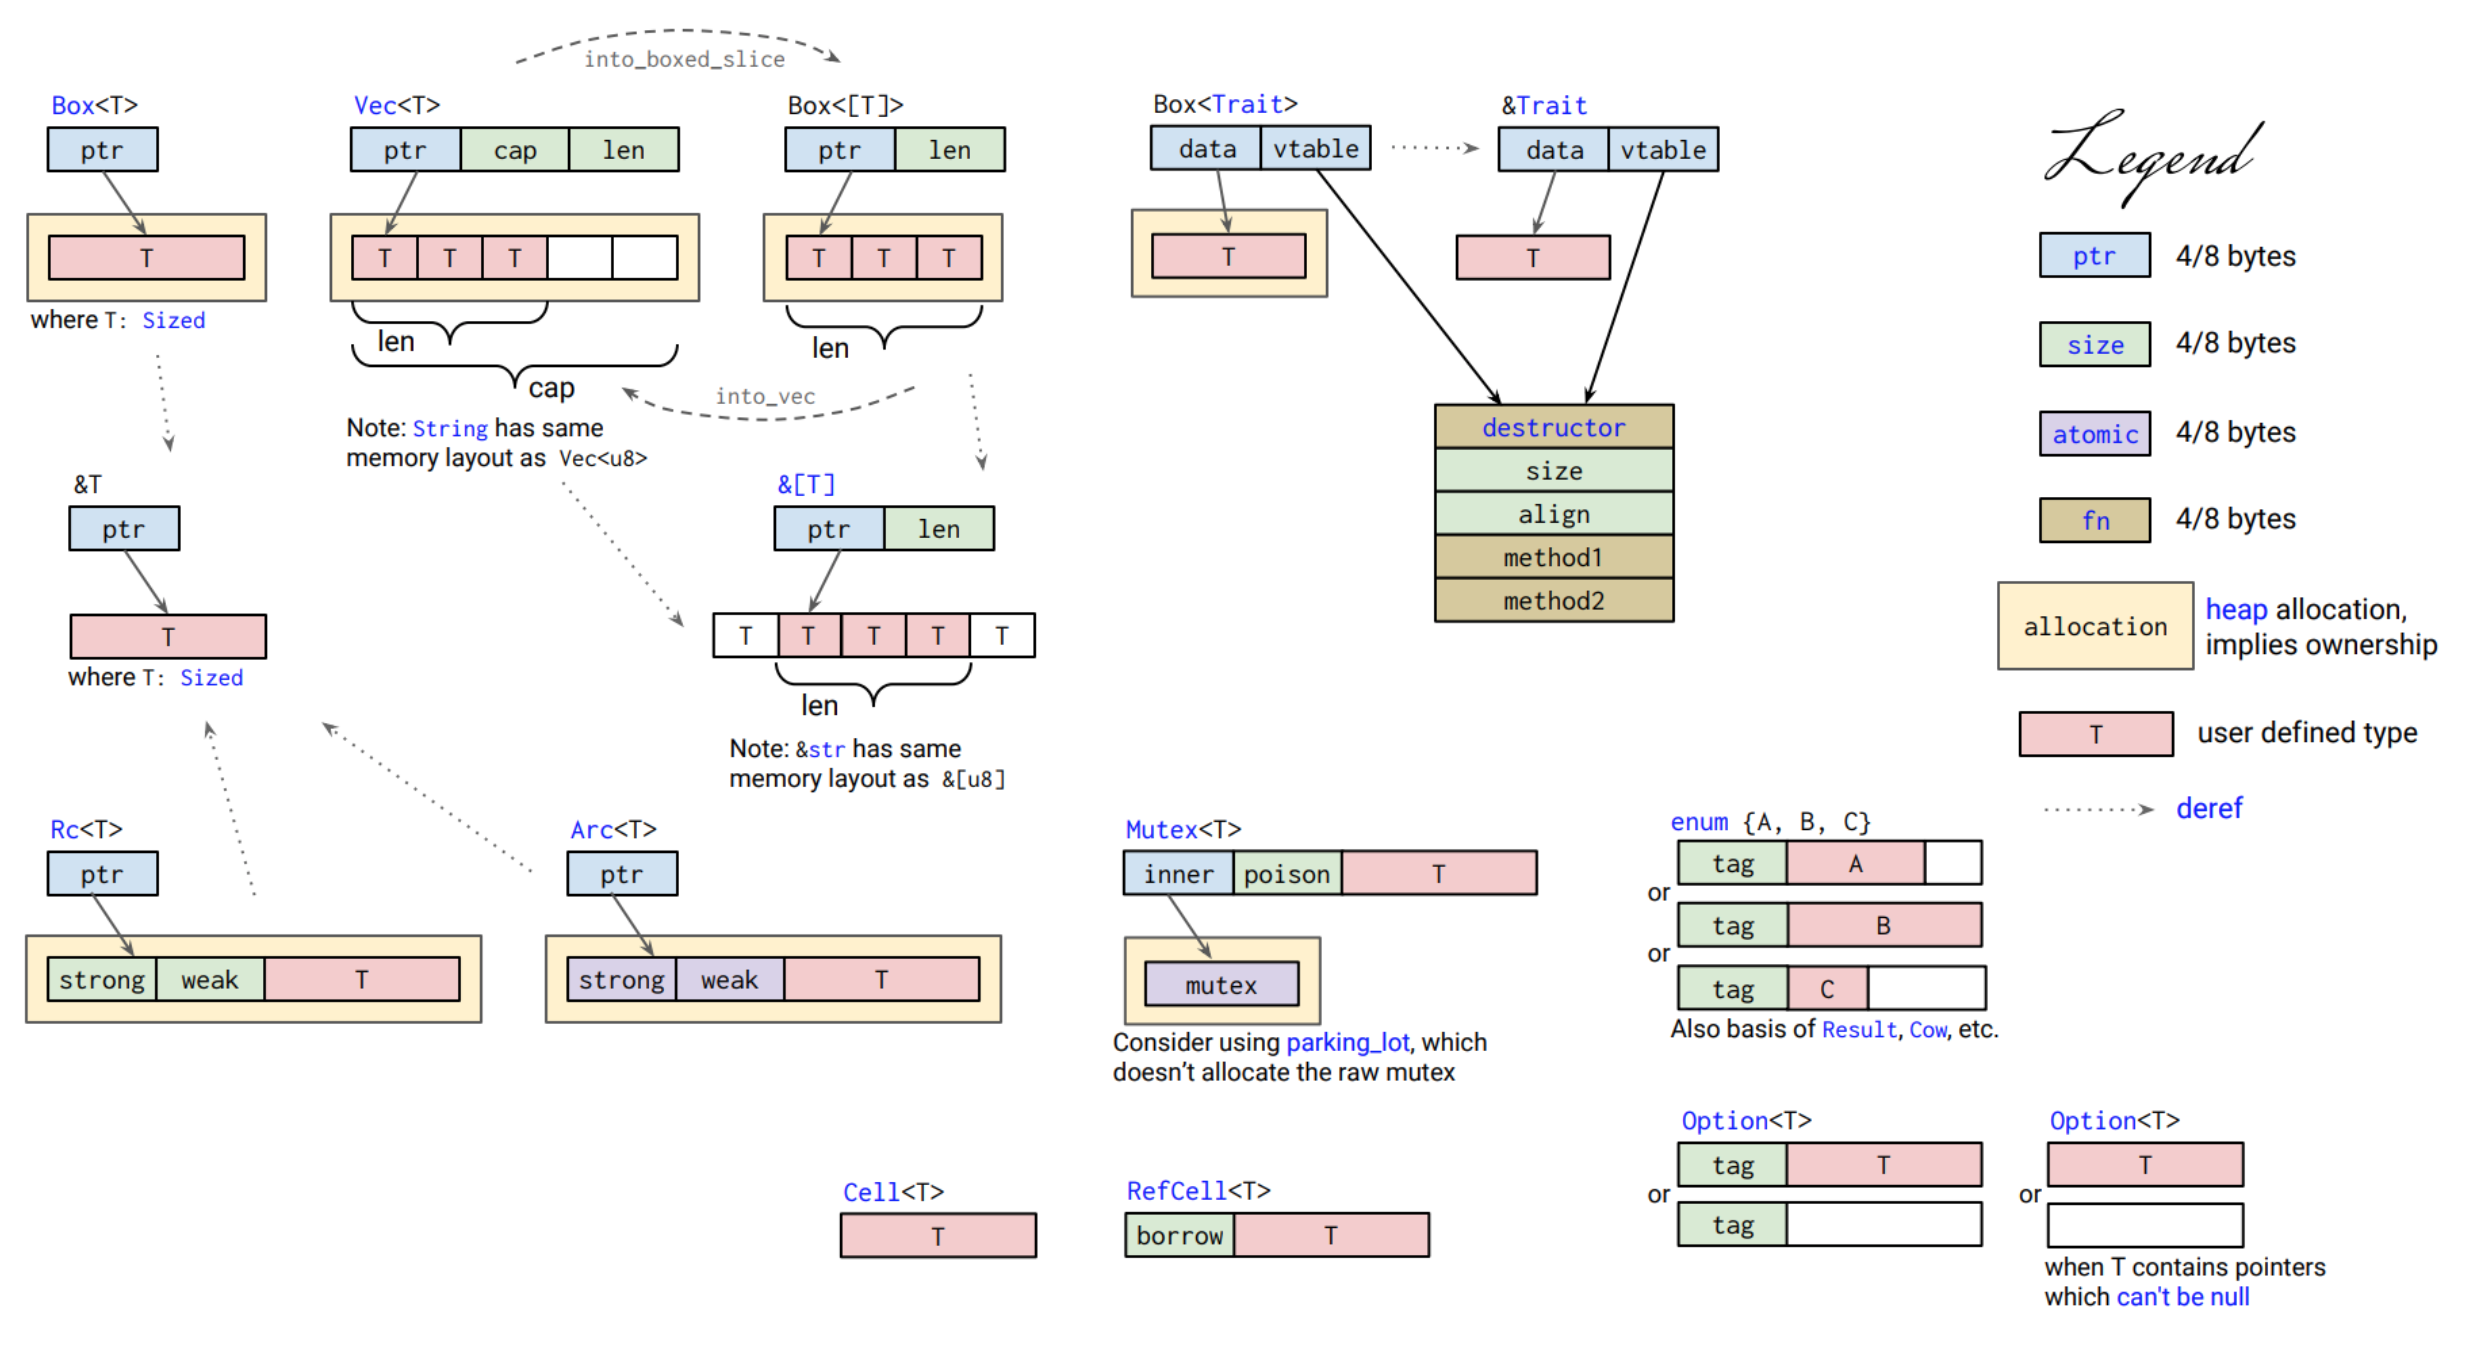
和我们之前接触到的 Array 不同,Vec具有动态的添加和删除元素的能力,并且能够以O(1)的效率进行随机访问。同时,对其尾部进行 push 或者 pop 操作的效率也是平摊O(1)的。同时,有一个非常重要的特性(虽然我们编程的时候大部分都不会考量它)就是,Vec 的所有内容项都是生成在堆空间上的,也就是说,你可以轻易的将 Vec move 出一个栈而不用担心内存拷贝影响执行效率——毕竟只是拷贝的栈上的指针。
另外的就是,Vec<T>中的泛型T必须是Sized的,也就是说必须在编译的时候就知道存一个内容项需要多少内存。对于那些在编译时候未知大小的项(函数类型等),我们可以用Box将其包裹,当成一个指针。
Vec 声明
声明向量有两种主要方法。一种类似于使用 new 的 String:
fn main() {
    let name1 = String::from("Windy");
    let name2 = String::from("Gomesy");

    let mut my_vec = Vec::new();
    // If we run the program now, the compiler will give an error.
    // It doesn't know the type of vec.

    my_vec.push(name1); // Now it knows: it's Vec<String>
    my_vec.push(name2);
}
或者,您可以只声明类型。
fn main() {
    let mut my_vec: Vec<String> = Vec::new(); // The compiler knows the type
                                              // so there is no error.
}
您可以看到向量中的项目必须具有相同的类型。创建向量的另一种简单方法是使用 vec!宏。它看起来像数组声明,但是具有 vec!在它前面。
fn main() {
    let mut my_vec = vec![8, 10, 10];
}
类型是 Vec<i32>。您称它为 i32 的 vec。Vec<String>是字符串 vec,Vec<Vec<String>>是字符串 vec 的 vec。
因为 Vec 实现了FromIterator这个 trait,因此,借助 collect,我们能将任意一个迭代器转换为 Vec。
let v: Vec<_> = (1..5).collect();
空间分配
因为 vec 比数组要慢,所以我们可以使用一些方法使其更快。vec 具有容量,这意味着赋予向量的空间。如果添加的向量多于其容量,它将使容量增加一倍,并将项目复制到新空间中。这称为重新分配。
fn main() {
    let mut num_vec = Vec::new();
    num_vec.push('a'); // add one character
    println!("{}", num_vec.capacity()); // prints 1
    num_vec.push('a'); // add one more
    println!("{}", num_vec.capacity()); // prints 2
    num_vec.push('a'); // add one more
    println!("{}", num_vec.capacity()); // prints 4. It has three elements, but capacity is 4
    num_vec.push('a'); // add one more
    num_vec.push('a'); // add one more // Now we have 5 elements
    println!("{}", num_vec.capacity()); // Now capacity is 8
}
因此,此向量具有三个重新分配:1 到 2,2 到 4 和 4 到 8。我们可以使其更快:
fn main() {
    let mut num_vec = Vec::with_capacity(8); // Give it capacity 8
    num_vec.push('a'); // add one character
    println!("{}", num_vec.capacity()); // prints 8
    num_vec.push('a'); // add one more
    println!("{}", num_vec.capacity()); // prints 8
    num_vec.push('a'); // add one more
    println!("{}", num_vec.capacity()); // prints 8.
    num_vec.push('a'); // add one more
    num_vec.push('a'); // add one more // Now we have 5 elements
    println!("{}", num_vec.capacity()); // Still 8
}
此向量具有 0 重新分配,更好。因此,如果您认为自己知道需要多少元素,可以使用 Vec::with_capacity() 使其更快。您还记得可以使用 .into() 将 &str 转换为字符串。您也可以使用它来将数组制成 Vec。您必须告诉 .into() 您想要一个 Vec,但不必选择 Vec 的类型。如果您不想选择,则可以编写 Vec <_>。
fn main() {
    let my_vec: Vec<u8> = [1, 2, 3].into();
    let my_vec2: Vec<_> = [9, 0, 10].into(); // Vec<_> means "choose the Vec type for me"
                                             // Rust will choose Vec<i32>
}
访问与修改
随机访问
就像数组一样,因为 Vec 借助Index和IndexMut提供了随机访问的能力,我们通过[index]来对其进行访问,当然,既然存在随机访问就会出现越界的问题。而在 Rust 中,一旦越界的后果是极其严重的,可以导致 Rust 当前线程 panic。因此,除非你确定自己在干什么或者在for循环中,不然我们不推荐通过下标访问。
以下是例子:
let a = vec![1, 2, 3];
assert_eq!(a[1usize], 2);
那么,Rust 中有没有安全的下标访问机制呢?答案是当然有:—— .get(n: usize)(.get_mut(n: usize))函数。
对于一个数组,这个函数返回一个Option<&T> (Option<&mut T>),当 Option==None 的时候,即下标越界,其他情况下,我们能安全的获得一个 Vec 里面元素的引用。
let v =vec![1, 2, 3];
assert_eq!(v.get(1), Some(&2));
assert_eq!(v.get(3), None);
迭代器
对于一个可变数组,Rust 提供了一种简单的遍历形式—— for 循环。 我们可以获得一个数组的引用、可变引用、所有权。
let v = vec![1, 2, 3];
for i in &v { .. } // 获得引用
for i in &mut v { .. } // 获得可变引用
for i in v { .. } // 获得所有权,注意此时 Vec 的属主将会被转移!!
但是,这么写很容易出现多层for循环嵌套,因此,Vec提供了一个into_iter()方法,能显式地将自己转换成一个迭代器。然而迭代器怎么用呢?我们下一章将会详细说明。
切片
fn main() {
    let vec_of_ten = vec![1, 2, 3, 4, 5, 6, 7, 8, 9, 10];
    // Everything is the same except we added vec!
    let three_to_five = &vec_of_ten[2..5];
    let start_at_two = &vec_of_ten[1..];
    let end_at_five = &vec_of_ten[..5];
    let everything = &vec_of_ten[..];

    println!("Three to five: {:?},
start at two: {:?}
end at five: {:?}
everything: {:?}", three_to_five, start_at_two, end_at_five, everything);
}
